오랜만에 구현한 기능은...
UI Sprite를 이용한 드래그박스!

모바일 게임이긴 한데, 드래그 박스를 만들일이 생겨서 한번 만들어 보았습니다.
코드는 되게되게 짧아서.... 흠...
일단 시작!
우선 드래그박스를 만들기 위해 어떤것들이 필요한지부터 생각해보면....
1. 드래그 입력
2. 드래그 박스?
이렇게 2개가 끝.. 일것 같습니다.
그래서 먼저 다음과 같은 변수들을 선언해 주었습니다.
     // UI로 사용할 패널
    public RectTransform selectionBox;

    // UI가 포함된 Canvas
    public Canvas canvas;

    private Vector2 startPos;
    private Vector2 endPos;

    private bool isDragging = false;
selectionBox는 박스를 그려줄? UI Sprite의 RectTransform 이고,
그걸 포함하고 있는 canvas, 그리고 드래그 시작지점과 진행 지점을 표시해줄 2개의 pos가 끝!
바로 입력 부분 시작하겠습니다.
    void Update()
    {
        if (Input.GetMouseButtonDown(0)) // 마우스 클릭 시작
        {
            RectTransformUtility.ScreenPointToLocalPointInRectangle(canvas.transform as RectTransform, Input.mousePosition, canvas.worldCamera, out startPos);

            isDragging = true;
        }


        if (Input.GetMouseButton(0)) // 드래그 중
        {
            RectTransformUtility.ScreenPointToLocalPointInRectangle(canvas.transform as RectTransform, Input.mousePosition, canvas.worldCamera, out endPos);
            DrawSelectionBox();
        }


        if (Input.GetMouseButtonUp(0)) // 드래그 끝!
        {
            selectionBox.gameObject.SetActive(false);
            isDragging = false;

        }
    }
이번에 사용해본 함수는 ScreenPointToLocalPointInRectangle함수인데,
기본적으로 현재 카메라의 위치에서 캔버스위에서의 마우스 포지션을 전달해주는 함수입니다.
(게임이 2D로 가거나, UI쪽으로 가게되면, RectTransformUtility 함수들을 많이 사용하던데.... 나중에 정리해보겠습니다.)
Unity - Scripting API: RectTransformUtility
Success! Thank you for helping us improve the quality of Unity Documentation. Although we cannot accept all submissions, we do read each suggested change from our users and will make updates where applicable. Close
docs.unity3d.com
일단 이 방식으로 마우스가 현재 캔버스의 어디에 위치하는지 Local값으로 각각 startPos, endPos에 전달해 주었습니다.
다음은 드래그 박스를 그려주는 부분.....
    void DrawSelectionBox()
    {
        if (!selectionBox.gameObject.activeSelf)
            selectionBox.gameObject.SetActive(true);

        Vector2 size = endPos - startPos;

        // 중심점 설정
        selectionBox.anchoredPosition = startPos + size / 2;
        selectionBox.sizeDelta = new Vector2(Mathf.Abs(size.x), Mathf.Abs(size.y));

    }
그림은 이상하지만, 다음과 같은 방식으로 그려주기로 하였습니다.
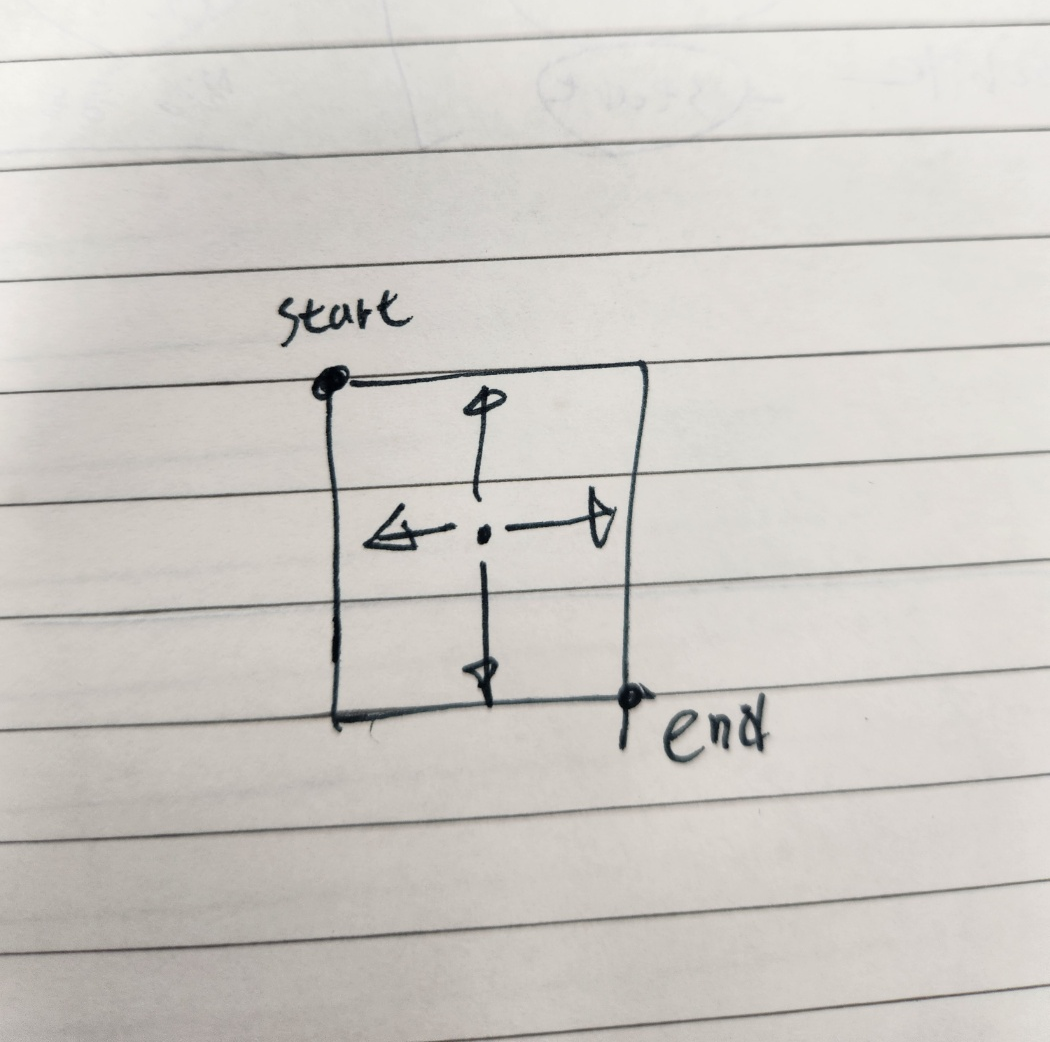
드래그를 진행중일때, 업데이트문을 통해 DrawSelectionBox를 실행하게 되는데,
이때 시작점과 끝점의 벡터를 계산하여,
중심점으로 부터 그 벡터의 크기만큼의 사이즈를 조절해, 드래그 박스가 만들어지는 그런 느낌의 ㅇㅇ
굳굳
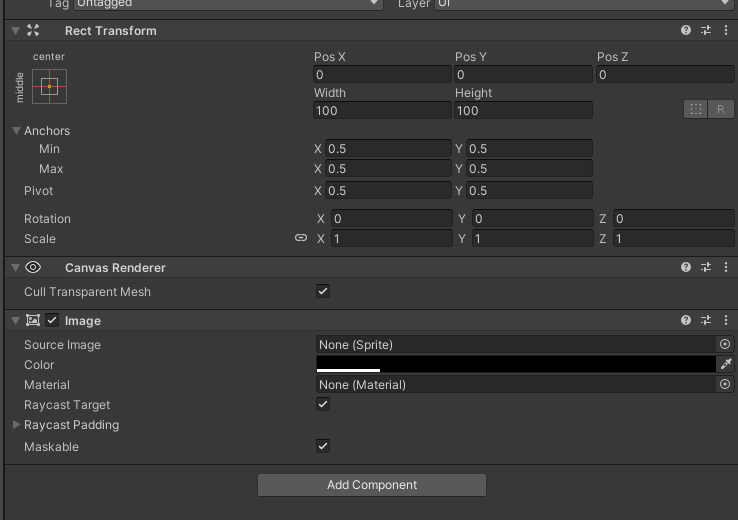
이제 컴포넌트를 설치하고, DragBox역할을 할 Sprite를 설치해주기만 하면 끝!

끝!
틀린점이 있다면 댓 달아주세요!

'유니티 최고 > 유니티 구현' 카테고리의 다른 글
| [Unity] 유니티 텍스트 입력에 따라 변하는 동적 채팅 UI (1) | 2025.02.19 |
|---|---|
| [Unity] 유니티 마우스 입력을 이용한 드래그 선택 (OverlapCollider) (0) | 2025.02.16 |
| [Unity] 유니티 Navigation 시스템을 이용한 클릭 이동 (NavMesh) (4) | 2024.11.06 |
| [Unity] 유니티 암호 입력 시스템구현에 대해서 (0) | 2024.11.04 |
| [Unity] 유니티 상호작용이 가능한 대화 시스템 구현[TaskCompletionSource를 이용한] (3) | 2024.10.17 |


댓글